Friday, May 15, 2009

Listing “Related Articles” with Sitecore using the LinkDatabase

Seems I am on a writing streak this week. Am taking a week off, you see, from my normal everyday Sitecore Consulting, and seem to have a bit of time on my hands to catch up on some of all the posts I’ve been meaning to write for a while. Don’t worry; after this I will probably be way too busy again for a while to find time to post ;-)


So I catching up on StackOverflow the other day, and an interesting question was posed; “How to find related items by tags in Lucene.NET”.


And while there probably IS a way to actually do this with Lucene.NET; I remember my initial thought was “but why go through all the hassle of configuring and setting it up to do this?”. Not only would it matter things from an Operations point of view; it would require more code and more code that was completely dependant on specific configuration settings in the Lucene indexes.


Now, let me be very clear, I am no big expert on Lucene. There are many of you out there who know it well, and would probably be able to cook up a solution to answer the guys question using it. As for myself, I try to keep as much arcane configuration out of any project I am involved in – especially to solve a problem such as this, where Sitecore pretty much gives you the tools you need to solve it straight out of the box.


So anyway. Guy was asking in a Lucene context, but was looking for proposals. And I decided to give it a whirl, mocked up some pseudo code to solve the problem, and that was that. But see; everyone can write pseudo-code :P   And it’s only fair I put my err… code where my mouth is, and write up a real example of how this can be achieved in a manner I explained. Here goes.


Setting it up in Sitecore

I start by making up two templates:


1) “Simple Value”, which will be used to organise the meta tags I will be drawing upon.

It has no fields.


2) “Article”, which I will use to demonstrate how to implement “Related Articles” functionality.

image


I then set up a meta-structure that I will be using to tag up my articles, and ultimately draw out related articles. I don’t fill out the entire structure, nor do I mean to imply this structure is perfect. But it is enough to demonstrate the point, and should be easy enough to follow. All the tags are based on the “Simple Value” template.


image


After this, I go through the somewhat tedious task of setting up a number of articles that are tagged in different ways.


For now, I type and tag in 7 articles; like this:


Name: Ben Hur

Tags: O2 Arena, Theatre


Name: Britney Spears

Tags: O2 Arena, Pop, Concert


Name: Depeche Mode

Tags: O2 Arena, Alternative, Concert


Name: Michael Jackson

Tags: O2 Arena, Pop, Concert


Name: Nickelback

Tags: O2 Arena, Rock, Concert


Name: Pet Shop Boys

Tags: O2 Arena, Pop, Concert


Name: War of the Worlds

Tags: O2 Arena, Theatre


I should probably go on for a while longer if I really wanted to go all-out in demonstrating this. However, I do have enough now, and it’ll have to do. I hate typing in test data ;-)


Before I go on, I should explain exactly how I intend to deduce what “related articles” should be. It can be done and determined in many ways – but I am proceeding exactly in the manner that was originally in question on StackOverflow. The rule can be described as two statements:


1) An article is related if it shares one or more tags with the source article

2) The more tags it shares, the more relevant it becomes (i.e. should appear higher on the list)


Lastly, I set up a blank .ASPX page in my webroot named “TestRelated.aspx”, and I quickly mock up two DomainObjects that I will build upon for this functionality.


SimpleValue.cs

using CorePoint.DomainObjects.SC;
using CorePoint.DomainObjects;

namespace Website.Related
{
    [Template("user defined/simple value")]
    public class SimpleValue : StandardTemplate
    {
    }
}


Article.cs

using System;
using System.Collections.Generic;
using CorePoint.DomainObjects.SC;
using CorePoint.DomainObjects;

namespace Website.Related
{
    [Template("user defined/article")]
    public class Article : StandardTemplate
    {
        [Field("title")]
        public string Title { get; set; }

        [Field("text")]
        public string Text { get; set; }

        [Field("tags")]
        public List<Guid> Tags { get; set; }
    }
}


And finally, in my TestRelated.aspx.cs, I add a bit of code to test that everything is as expected.

public partial class TestRelated : System.Web.UI.Page
{
    protected void Page_Load( object sender, EventArgs e )
    {
        var director = new SCDirector();

        List<Article> articles = director.GetChildObjects<Article>( "/sitecore/content/global/articles" );
        foreach ( Article article in articles )
        {
            // Get the SimpleValues (name) from the tag Guids
            var simpleValues = article.Tags.ConvertAll<string>( a => 
                        { 
                            return director.GetObjectByIdentifier<SimpleValue>( a ).Name; 
                        } );
            StringBuilder sb = new StringBuilder();
            simpleValues.ForEach( sv => sb.Append( sv + ' ' ) );

            Response.Write( string.Format(
                             "Name: {0}<br />Tags: {1}<br /><br />",
                             article.Name,
                             sb.ToString() ) );
        }
    }
}


So far so good. I run the code, and I get a replica of the list I already showed:


Name: Ben Hur
Tags: O2 Arena Theater
Name: Britney Spears
Tags: Pop Concert O2 Arena
Name: Depeche Mode
Tags: O2 Arena Concert Alternative
Name: Michael Jackson
Tags: Pop Concert O2 Arena
Name: Nickelback
Tags: Rock Concert O2 Arena
Name: Pet Shop Boys
Tags: O2 Arena Concert Pop
Name: War of the Worlds
Tags: O2 Arena Musical


Excellent. After all this, I am now ready to proceed to the good stuff ;-)


Finding Related Articles using the Sitecore LinkDatabase

Having an Article entity in place, makes this an obvious place to add functionality such as Related Articles. I could either add it as a Lazy Load property named “Related Articles”, or I could write a method named “GetRelatedArticles()”. This is mostly down to aesthetics and practices; personally I prefer the first option.


I expand the Article.cs with a little bit of code. The original pseudo-code I suggested, is entered in comments, for reference.

private int _referenceCount;
List<Article> _RelatedArticles = null;
public List<Article> RelatedArticles
{
    get
    {
        if ( _RelatedArticles == null )
        {
            _RelatedArticles = new List<Article>();
            var referenceCount = new Dictionary<Guid, int>();

            // for each ID in tags
            foreach ( Guid id in Tags )
            {
                var sv = Director.GetObjectByIdentifier<SimpleValue>( id );

                // Personal note: In this particular instance, performance
                // could be gained here, but not loading up full articles
                // via DomainObjects but hitting the LinkDatabase directly instead

                // get all documents referencing this tag
                List<Article> articles = sv.GetReferrers<Article>();

                // for each document found
                articles.ForEach( a =>
                    {
                        if ( a.Id != Id )
                        {
                            // if master-list contains document; 
                            if ( referenceCount.ContainsKey( a.Id ) )
                                referenceCount[ a.Id ]++; // increase usage-count
                            else // else; 
                                // add document to master list
                                referenceCount[ a.Id ] = 1;
                        }
                    } );
            }

            // Now we have a list of all the relevant guids being referenced on all tags
            // on this article. Load them up, and stamp them with the reference count
            foreach ( var key in referenceCount.Keys )
            {
                var relatedArticle = Director.GetObjectByIdentifier<Article>( key );
                relatedArticle._referenceCount = referenceCount[ key ];
                _RelatedArticles.Add( relatedArticle );
            }
            
            // sort master-list by usage-count descending
            _RelatedArticles.Sort( ( a, b ) => b._referenceCount.CompareTo( a._referenceCount ) );
        }

        return _RelatedArticles;
    }
}


And to test if what I’m getting from this is what I expect, I also add some code to my TestRelated.aspx so it becomes:

protected void Page_Load( object sender, EventArgs e )
{
    var director = new SCDirector();

    List<Article> articles = director.GetChildObjects<Article>( "/sitecore/content/global/articles" );
    foreach ( Article article in articles )
    {
        // Get the SimpleValues (name) from the tag Guids
        var simpleValues = article.Tags.ConvertAll<string>( a => 
                    { 
                        return director.GetObjectByIdentifier<SimpleValue>( a ).Name; 
                    } );
        StringBuilder sb = new StringBuilder();
        simpleValues.ForEach( sv => sb.Append( sv + ", " ) );

        Response.Write( string.Format(
                         "Name: {0}<br />Tags: {1}<br />Related Articles: ",
                         article.Name,
                         sb.ToString() ) );

        article.RelatedArticles.ForEach( ra =>
                Response.Write( string.Format( "{0},", ra.Name ) ) );

        Response.Write( "<hr />" );
    }
}


And after all this, I am pleased to find a result looking like:


Name: Ben Hur
Tags: O2 Arena, Theater,
Related Articles: Michael Jackson,Britney Spears,Depeche Mode,Nickelback,Pet Shop Boys,War of the Worlds,


Name: Britney Spears
Tags: Pop, Concert, O2 Arena,
Related Articles: Michael Jackson,Pet Shop Boys,Depeche Mode,Nickelback,Ben Hur,War of the Worlds,

Name: Depeche Mode
Tags: O2 Arena, Concert, Alternative,
Related Articles: Britney Spears,Michael Jackson,Nickelback,Pet Shop Boys,War of the Worlds,Ben Hur,
Name: Michael Jackson
Tags: Pop, Concert, O2 Arena,
Related Articles: Britney Spears,Pet Shop Boys,Depeche Mode,Nickelback,Ben Hur,War of the Worlds,

Name: Nickelback
Tags: Rock, Concert, O2 Arena,
Related Articles: Britney Spears,Depeche Mode,Pet Shop Boys,Michael Jackson,Ben Hur,War of the Worlds,
Name: Pet Shop Boys
Tags: O2 Arena, Concert, Pop,
Related Articles: Britney Spears,Michael Jackson,Depeche Mode,Nickelback,War of the Worlds,Ben Hur,

Name: War of the Worlds
Tags: O2 Arena, Musical,
Related Articles: Ben Hur,Britney Spears,Depeche Mode,Nickelback,Pet Shop Boys,Michael Jackson,


The first thing that strikes me is; my meta data and test data probably aren’t extensive enough to really see this functionality in full effect. They all look almost the same.


However, I can determine that it works as expected. “Britney Spears”, “Michael Jackson” and “Pet Shop Boys” all share the same 3 meta tags. They SHOULD in all instances suggest the “one left out” on top of the list as “Related Articles”.  And they all do; I’ve marked them in bold and underline.  Also note that the “Depeche Mode” concert in O2 Arena lists other concerts (although of different music genre) before it proceeds to list the musicals and theatre plays.


It works :-)


A few notes on performance

In this post, I’ve deliberately not focused excessively on performance implications. Don’t worry – it’s not at all bad. But in “real life”; there are still obvious places in this code where you could potentially gain a significant amount of performance. As everyone will know; I/O operations are by an order of magnitude some of the most expensive calls we can make, and there is definitely a few places you could set in here.


A few suggestions I would look into if I were to take this code live:


  • Code up a TagController; that will eventually act as a cache for all the tags in your solution. Load up the tags only once, and don’t repeatedly re-load them in your loops.
  • In this case, bypass the very convenient .GetReferrers() method provided by DomainObjects and go through the extra work of working with the LinkDatabase directly yourself. For this part of the algorithm (counting up how many times a given ID is referencing your tag), you don’t really need to load up the Sitecore Item – something .GetReferrers() will automatically do. I will put this on the TODO list for DomainObjects.
  • And – as ALWAYS – don’t forget to configure caching for whatever sublayouts and/or user controls you are calling this functionality on.


That’s it for this time. I hope you found this useful  :-)

Labels: , ,

Wednesday, May 13, 2009

Working with web.config include files in Sitecore 6

In my previous post about Working with multiple content databases; Lars Floe Nielsen made a comment about something I’ve been meaning to write about for a long time.


Configuration files. Such a pain, aren’t they?


Anyone who has ever stepped through 6 Sitecore upgrades and meticulously stepped through the web.config change instructions line by line will know what I mean. Would be so much easier to just replace your web.config with the one matching the latest Sitecore version you were upgrading to.


Or what about your environments?   Dev environment, Staging environment, Live environment, Slave server environment?   All with different configuration settings. This has already been blogged about, and I am not going to dig particularly deep into this topic in this post.


Starting from Sitecore 6 (actually, V5, but I’ve had a very hard time tracking more information down on it than can be found in Alexeys post on the matter), Sitecore actually introduced a really neat new functionality. It’s called “Web Config Patching”, but to be honest I don’t personally like the term “patching” being used in this context, even if this IS technically what the functionality does.


So far, I have not really been able to locate much in terms of official documentation on this subject (searching SDN directly provides very few clues), so most of my knowledge on it comes from personal experience, chatting with other Sitecore consultants/investigators, studying other configuration include files and spiced with generous dosages of Reflector.


In the “What’s new” released for Sitecore 6, the functionality gets the following mention:


“Previous versions of Sitecore CMS forced administrators to make direct changes to configuration settings in the web.config file manually. This led to challenges locating local configuration changes as opposed to modifications made by Sitecore when upgrading to a new version of Sitecore. Sitecore 6 offers a smart solution: web.config modifications can now be made in a separate XML file, stored under the /App_Config/Include folder, which Sitecore reads in at startup time after loading the web.config file. The folder contains several example files which illustrate how to use this feature. The Sitecore 6 configuration factory reads the include config files”


The information appears out of date however, and no such “example files” can be found in any version of Sitecore 6 I have had my hands on.


Anyway. On we go.


So how and where does it work?

To make good use of config includes, one must first understand how Sitecore implements it. And to get some idea of this, one must know a little bit about how a web.config file is organised.


If you open up a standard Sitecore web.config and look near the top, the first thing you will see will be looking something like this:

<?xml version="1.0" encoding="utf-8"?>
<configuration>
  <configSections>
    <section name="sitecore" type="Sitecore.Configuration.ConfigReader, Sitecore.Kernel" />
    <section name="log4net" type="log4net.Config.Log4NetConfigurationSectionHandler, 
                                  Sitecore.Logging" />
    <sectionGroup name="system.web.extensions" type="System.Web.Configuration.SystemWebExtensionsSectionGroup, 
                                                     System.Web.Extensions, Version=3.5.0.0, Culture=neutral, 
                                                     PublicKeyToken=31BF3856AD364E35">
      <sectionGroup name="scripting" type="System.Web.Configuration.ScriptingSectionGroup, 
                                           System.Web.Extensions, Version=3.5.0.0, Culture=neutral, 
                                           PublicKeyToken=31BF3856AD364E35">
        <section name="scriptResourceHandler" type="System.Web.Configuration.ScriptingScriptResourceHandlerSection, 
                                                    System.Web.Extensions, Version=3.5.0.0, Culture=neutral, 
                                                    PublicKeyToken=31BF3856AD364E35" 
                 requirePermission="false" allowDefinition="MachineToApplication" />
        <sectionGroup name="webServices" type="System.Web.Configuration.ScriptingWebServicesSectionGroup, 
                                               System.Web.Extensions, Version=3.5.0.0, Culture=neutral, 
                                               PublicKeyToken=31BF3856AD364E35">
          <section name="jsonSerialization" type="System.Web.Configuration.ScriptingJsonSerializationSection, 
                                                  System.Web.Extensions, Version=3.5.0.0, Culture=neutral, 
                                                  PublicKeyToken=31BF3856AD364E35" 
                   requirePermission="false" allowDefinition="Everywhere" />
          <section name="profileService" type="System.Web.Configuration.ScriptingProfileServiceSection, 
                                               System.Web.Extensions, Version=3.5.0.0, Culture=neutral, 
                                               PublicKeyToken=31BF3856AD364E35" 
                   requirePermission="false" allowDefinition="MachineToApplication" />
          <section name="authenticationService" type="System.Web.Configuration.ScriptingAuthenticationServiceSection, 
                                                      System.Web.Extensions, Version=3.5.0.0, Culture=neutral, 
                                                      PublicKeyToken=31BF3856AD364E35" 
                   requirePermission="false" allowDefinition="MachineToApplication" />
          <section name="roleService" type="System.Web.Configuration.ScriptingRoleServiceSection, 
                                            System.Web.Extensions, Version=3.5.0.0, Culture=neutral, 
                                            PublicKeyToken=31BF3856AD364E35" 
                   requirePermission="false" allowDefinition="MachineToApplication" />
        </sectionGroup>
      </sectionGroup>
    </sectionGroup>
  </configSections>


What is declared here, are the different Configuration Sections that ASP.NET can expect to find in the configuration file. Some of them are there to support ASP.NET, and some of them are put in there by Sitecore. You can learn more about the format of ASP.NET configuration files here.


Basically, what this then means is, that various “top level” configuration sections can be expected to appear in the web.config file we are looking at, and ASP.NET will (via the “type” attribute) know how to parse them. For normal every day use, most of us have probably been able to just use <appSettings> for whatever configuration we needed – but for configuring a complex application such as Sitecore, this just won’t be enough. Fortunately this is why ASP.NET allows us to create our own configuration sections with our own configuration handlers; and that is exactly what Sitecore has been doing for a very long time.


Now. Keeping in mind what I wrote above; Sitecore came up with a system that allows the include of configuration files. Tying that into what we just learned; to find and use this functionality we must then look in the config section that Sitecore provides. Not surprisingly, this section is called <sitecore> and this is where you configure the vast majority of what you need to do, to get your Sitecore installation up and running the way you want it.


Config Include only works in this configuration section


First thing to keep in mind, when using this technology.


This means it won’t work for <appSetting> configuration settings. Don’t worry about it – Sitecore has a perfectly good replacement for it; I’ll demonstrate in a bit.


How to set it up?

Here’s a bit of good news. There’s nothing really to set up. Sitecore comes with this functionality enabled out of the box, and all you need to do is to tap into it and use it.


If you open up Windows Explorer and navigate to /Website/App_Config/Include, you will (probably) find an empty folder. This is a directory that Sitecore is actively watching, for any additions or changes to it’s base web.config file. Remember I said how it was not fully correct to call this “config include”?  This is because Sitecore actually offers more than just including more configuration files; it also allows you to edit existing configuration data defined in web.config. As long as it sits in the <sitecore> section :-)


As so often before when I am testing something; I create a new .ASPX file (with codebehinds) in the root of my website; I name it “TestInclude.aspx”, and I type the following code into the class Visual Studio generates for me:

public partial class TestInclude : System.Web.UI.Page
{
    protected void Page_Load( object sender, EventArgs e )
    {
        Response.Write( "The value of setting 'TestInclude' is: " + 
                        Sitecore.Configuration.Settings.GetSetting( "TestInclude", "Undefined" ) );
    }
}


At this point, the result I get when running the page is entirely as expected; “The value of setting 'TestInclude' is: Undefined”


Notice how the Sitecore API equivalent is much more elegant than the ASP.NET standard handling which would achieve the above in the <appSettings> section.

string val;
if ( System.Configuration.ConfigurationManager.AppSettings[ "TestInclude" ] != null )
    val = System.Configuration.ConfigurationManager.AppSettings[ "TestInclude" ];
else
    val = "Undefined";


But we’re not there yet. I then proceed to create a “New File” in the folder I mentioned above; /App_Config/Include and name it “TestInclude.config”

<?xml version="1.0" encoding="utf-8" ?>
<configuration xmlns:patch="http://www.sitecore.net/xmlconfig/">
  <sitecore>
    <settings>
      <setting name="TestInclude" value="This value comes from TestInclude.config"/>
    </settings>
  </sitecore>
</configuration>

I run my .ASPX page again; and this time I get the result I was hoping for. “The value of setting 'TestInclude' is: This value comes from TestInclude.config”.


Great! :-)  Things are working as expected. And I now have my own configuration files in a nice isolated area that can be easily packaged and deployed WITHOUT needing to worry (much) about the version of Sitecore that may be in place; and without needing to touch the original web.config in any way what so ever.


There’s another benefit; or at least in a majority of cases this is a benefit. Making modifications to your config include files take effect (almost) instantly and do not recycle your application pool.


Updating your config files will not force your website to reset


Another important fact to keep in mind. For better and (sometimes) for worse.


Notice how this is not limited to work with only <settings>. Anything in the Sitecore configuration structure can be added in your include file. If I wanted to add a new XSL helper, for instance, I would expand my file like this:

<?xml version="1.0" encoding="utf-8" ?>
<configuration xmlns:patch="http://www.sitecore.net/xmlconfig/">
  <sitecore>
    <xslExtensions>
      <extension mode="on" type="CorePoint.XslHelpers.XslHelper, CorePoint.Library" 
                 namespace="http://www.corepoint-it.com/library/xslhelper" singleInstance="true" />
    </xslExtensions>

    <settings>
      <setting name="TestInclude" value="This value comes from TestInclude.config"/>
    </settings>
  </sitecore>
</configuration>

One last thing to mention about these include files before proceeding is; you can have as many of them as you like. They need to end in .config, but other than that there are no limitations. You can even create sub folders to your App_Config/Include directory and place your .config files there if you prefer; they too will be picked up by Sitecore’s configuration system.


More advanced work with your config include files

In the example I just went through, I adeptly (or maybe not…) skipped explaining part of the reason the config include file I created looks the way it does. What I did was to work with the include system in it’s simplest form. If you picture in your mind your original web.config file, and then merge my XML on top of it; you have a pretty good idea of what I have just done.


And this is fine; for settings. After all, a setting is a setting, and it matters not exactly WHERE in the configuration file the setting appears.


But what about the times when it does matter?  Like for Sitecore pipelines for instance; I can assure you the order of which these pipelines executes is NOT irrelevant.


Positioning your configuration within the web.config is fortunately easily achieved. A few examples probably explain it better than I can type myself out of. So here goes.

<?xml version="1.0" encoding="utf-8" ?>
<configuration xmlns:patch="http://www.sitecore.net/xmlconfig/">
  <sitecore>
    <pipelines>
      <httpRequestBegin>
        <!-- Insert own pipeline processor as the first element of the pipeline -->
        <processor patch:before="*[1]" type="CorePoint.Tracking.RequestTracker, CorePoint.Library" />

        <!-- Insert own pipeline processor right after the Language Resolver -->
        <processor patch:after="*[@type='Sitecore.Pipelines.HttpRequest.LanguageResolver, Sitecore.Kernel']"
                   type="CorePoint.Tracking.LanguageTracker, CorePoint.Library" />
      </httpRequestBegin>
    </pipelines>
    
    <settings>
      <setting name="TestInclude" value="This value comes from TestInclude.config"/>
    </settings>
  </sitecore>
</configuration>


As you can probably see, fairly advanced stuff can be done with configuration files. Most of this syntax and form I have exclusively from Reflector use, and I may not have it spot on correct. Finding official documentation on this topic has proven to be next to impossible. Except for lots of references on various comments around the web (recommended practise is to use config includes or “auto-includes” as they are also called) of course – but knowing HOW to use them is what this post is all about :-)


I would love to know how one can:

  1. Remove an existing configuration entirely
  2. Replace an existing functionality entirely


Both seem possible from digging around in Reflector – but given that this is actually a fairly involved process to test (at 2am in the morning), I chose to let the matter rest for this time. I will get back with an update if and when I learn more.


In summary

  • Configuration include files is probably one of the features I personally like very much from an operational perspective in Sitecore 6
  • The functionality is way under-documented; but hopefully now this post can help you get started
    • So please; no more 3-page documents describing how to “merge” your configuration into web.config for <insert your module/functionality name here> :P
  • You can modify config include files without resetting your website AppPool
  • And lastly, it only works in the <sitecore> configuration section. Don’t attempt it for <system.web> or <system.webserver> for instance, it won’t work.

Labels: , ,

Friday, May 08, 2009

Working with multiple content databases in Sitecore 6

One of the very neat things about Sitecore, is the way the architecture allows you to mould, shape, and work with the configuration files to come up with an implementation that suits your purpose.


As the title of this post will suggest, I will be taking a look at Sitecore databases in this post; and how you are free to work with as many of them as you see fit in your projects.


For sake of argument, let’s say that you were tasked with expanding an existing Sitecore website with a Products database. Potentially, this database would be holding tens-of-thousands of products – at least if you are to believe the PowerPoint slides of sales projections the CEO presented last week ;-)


Now I KNOW what the first argument would be; “Don’t store in Sitecore. Sitecore is meant to build and store websites, and something as “businessey” as a Products Database has no place there”. I beg to differ however – as long as we’re not assuming there are ERP systems involved; we’re starting entirely from scratch.


I find, that actually, Sitecore is perfect for the job. Just in short summary, by using Sitecore as our data platform, we get (at the very least) the following handed to us on a silver platter:


  • Flexible hierarchical storage structure
  • Multi-lingual meta data for product descriptions and so on
  • Built-in advanced media library and media handling
  • Easily modelled data templates
  • Standard stuff, like workflows, security and so on
  • Can be edited and maintained using familiar tools
    • Don’t overlook this one. If you place the data in “traditional” SQL tables – YOU are going to need to write an interface that creates, edits and maintains your product data
    • WHAT are you going to say, when the customer asks for “advanced” stuff such as Workflows, Automatic Image Scaling / Thumbnail creation, granular (field based) security, Publishing functionality, Spell checking… ?   Just naming a few here, but let’s not be blind to what Sitecore is offering out of the box
    • What will it cost?


So just bear with me here. Am not saying that every case is a case for data going into Sitecore and “living” there. But what I am saying is, it’s not something that should be discarded as an option without further investigation. Like everything software, there are tradeoffs involved. Make sure you make the right trade.


Setting it up

Right. So let’s get started.


In my example here, I downloaded a fresh copy of Sitecore 090416 (ZIP archive of the web root, we’re all developers here. The Installer is for marketers ;-))


I’m going to be using SQL Server Express, so I get rid of the Oracle and SQL 2000 files. For my Products Database, I will be using the Sitecore “Master” database as a foundation, so I take a copy of the files and rename them like this:


copy


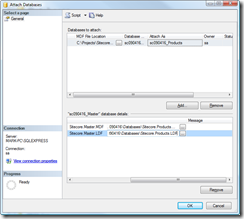
And then I proceed to attach them:


attach


And eventually end up with 4 databases attached, like this:


databases


So far so good. I continue to set up an IIS site for this, and a local host header of “sc090416”. All of this you hopefully know all about, so I won’t go into detail with it here. The point of this post is not basic Sitecore installation – we’re all here to look at databases ;-)


A few things that you need to do, which you wouldn’t normally, is to configure our new Products Database in Sitecore. First, open up /Website/App_Config/ConnectionStrings.config and configure the extra database. It could look like this:


<?
xml version="1.0" encoding="utf-8"?>
<
connectionStrings>
  <!--
   
Sitecore connection strings.
    All database connections for Sitecore are configured here.
 
-->
  <
add name="core" connectionString="user id=sa;password=removed;Data Source=.\SQLEXPRESS;Database=sc090416_Core" />
  <
add name="master" connectionString="user id=sa;password=removed;Data Source=.\SQLEXPRESS;Database=sc090416_Master" />
  <
add name="web" connectionString="user id=sa;password=removed;Data Source=.\SQLEXPRESS;Database=sc090416_Web" />

  <
add name="products" connectionString="user id=sa;password=removed;Data Source=.\SQLEXPRESS;Database=sc090416_Products" />
</
connectionStrings>

Very straight forward, so far. But we’re not done yet. Open up Web.Config, look for the <databases> element, and find <!—master —>. For now, just copy the entire section – like this:

!      <!-- products>
!      <database id="products" singleInstance="true" type="Sitecore.Data.Database, Sitecore.Kernel">
        <param desc="name">$(id)</param>
        <icon>People/16x16/cubes_blue.png</icon>
        <dataProviders hint="list:AddDataProvider">
          <dataProvider ref="dataProviders/main" param1="$(id)">
            <prefetch hint="raw:AddPrefetch">
              <sc.include file="/App_Config/Prefetch/Common.config" />
              <sc.include file="/App_Config/Prefetch/Master.config" />
            </prefetch>
          </dataProvider>
        </dataProviders>
        <securityEnabled>true</securityEnabled>
        <proxiesEnabled>false</proxiesEnabled>
        <publishVirtualItems>true</publishVirtualItems>
        <proxyDataProvider ref="proxyDataProviders/main" param1="$(id)" />
        <workflowProvider hint="defer" type="Sitecore.Workflows.Simple.WorkflowProvider, Sitecore.Kernel">
          <param desc="database">$(id)</param>
          <param desc="history store" ref="workflowHistoryStores/main" param1="$(id)" />
        </workflowProvider>
        <indexes hint="list:AddIndex">
          <index path="indexes/index[@id='system']" />
        </indexes>
        <archives hint="raw:AddArchive">
          <archive name="archive" />
          <archive name="recyclebin" />
        </archives>
        <Engines.HistoryEngine.Storage>
          <obj type="Sitecore.Data.$(database).$(database)HistoryStorage, Sitecore.Kernel">
            <param connectionStringName="$(id)" />
            <EntryLifeTime>30.00:00:00</EntryLifeTime>
          </obj>
        </Engines.HistoryEngine.Storage>
        <Engines.HistoryEngine.SaveDotNetCallStack>false</Engines.HistoryEngine.SaveDotNetCallStack>
        <cacheSizes hint="setting">
          <data>20MB</data>
          <items>10MB</items>
          <paths>500KB</paths>
          <standardValues>500KB</standardValues>
        </cacheSizes>
      </database>


Right. The only changes I made to this copy, are marked on the lines with !. Essentially the only thing changing are references to “master” which now become “products”.


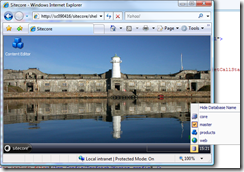
With this change, I am now ready to log into Sitecore for the first time and check that everything is in order.


products


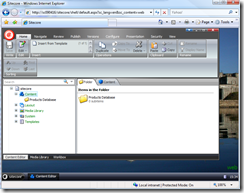
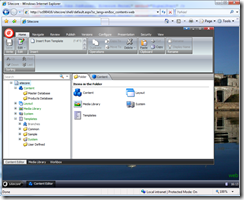
So far, everything is looking good. Sitecore has recognised my new database. I can switch to it – and you know…  it looks just like the “master” database ;-)   At this point, this should not really be a surprise.


Testing it


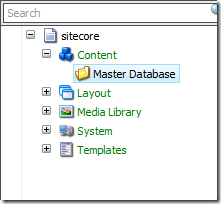
To further test things, I create a couple of content items. In the “master” database, I delete the /Home node, and create:


master


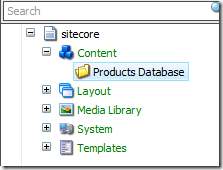
I then switch to the “products” database, and create a similar (yet different) folder.


product2


Time to stop for a minute. Why did I delete /Home?


Well here’s the thing. The Home node that “master” is "born” with, so to speak, is just a placeholder really. At least that’s how I see it. Right now, my concern is, that if we leave the /Home node in both databases – we will have two items in two different databases, but sharing the same ID. What happens if you edit it in one database – should it overwrite changes done in the other?  While pursuing this question could be fun – I don’t really think this is a scenario Sitecore will support and I frankly don’t know what would happen. At this point I don’t much care to find out either :P


So anyway.


I have my two new folders, and I do a publish. Now at this point, there are a couple of things you would be expecting to see. Upon switching to the “web” database to have a look, I think I can pretty much guarantee that whatever you were expecting, it wasn’t this:


web


Well ok. To be fair, maybe it was. But of all the things I personally expected when I first tried this, this was not the result I was hoping for and certainly not expecting ;-)


So what is happening here?


I guess, the most accurate answer would be, Sitecore isn’t really designed to work like this. While the concept of multiple databases IS certainly supported – you are supposed to use Proxy items to “merge” all of the data from “extra” databases (like our Products) into the main “master” database and then publish from there.
 

This doesn’t answer the question however, what IS happening?


Well I started investigating, and the first thing I looked into was the publishItem pipeline. Out of the box, it looks like this:

<publishItem help="Processors should derive from Sitecore.Publishing.Pipelines.PublishItem.PublishItemProcessor">
  <processor type="Sitecore.Publishing.Pipelines.PublishItem.RaiseProcessingEvent, Sitecore.Kernel" />
  <processor type="Sitecore.Publishing.Pipelines.PublishItem.CheckVirtualItem, Sitecore.Kernel" />
  <processor type="Sitecore.Publishing.Pipelines.PublishItem.CheckSecurity, Sitecore.Kernel" />
  <processor type="Sitecore.Publishing.Pipelines.PublishItem.DetermineAction, Sitecore.Kernel" />
  <processor type="Sitecore.Publishing.Pipelines.PublishItem.PerformAction, Sitecore.Kernel" />
  <processor type="Sitecore.Publishing.Pipelines.PublishItem.RemoveUnknownChildren, Sitecore.Kernel" />
  <processor type="Sitecore.Publishing.Pipelines.PublishItem.MoveItems, Sitecore.Kernel" />
  <processor type="Sitecore.Publishing.Pipelines.PublishItem.RaiseProcessedEvent, Sitecore.Kernel" runIfAborted="true" />
  <processor type="Sitecore.Publishing.Pipelines.PublishItem.UpdateStatistics, Sitecore.Kernel" runIfAborted="true">
    <traceToLog>false</traceToLog>
  </processor>
</publishItem>


And if going by names is enough (and it is), my suspicion instantly fell on RemoveUnknownChildren. A little work with Reflector quickly reveals what one of the main purposes of this item processor is.


It essentially gets a list of child item IDs in the “source” database and removes them if they are not present in the “destination” database.


This can be tested quickly enough. Switch to “master” – run a publish and check the result. Sure enough, our “Master Database” folder is now there, alone. Swithing to “products” and running a publish gives us a new result; now the “Master Database” folder is gone, but the “Products Database” folder is present.


Curious as I am, I proceeded to disable this processor, to see what happened.

<!--<processor type="Sitecore.Publishing.Pipelines.PublishItem.RemoveUnknownChildren, Sitecore.Kernel" />-->

Result:


disabled


Voila. It looks good. At least on paper ;-)


While I am not completely comfortable with an intrusion such as this, disabling a system processor in the publishing pipeline, it at least allows me to move a bit forward on what I was aiming to achieve. If I dare to, that is.


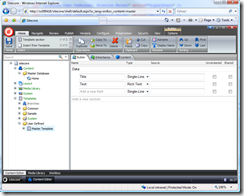
In “master” I mock up a new template, and an item named Home, based on it:


master


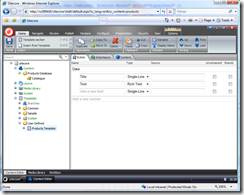
And in Products, something similar.


products2


And after publishing the respective databases, I get the (now) expected end result.


web2


Pretty neat :-)


Alas however, as I mentioned above, having to modify web.config to achieve this kind of behaviour worries me. I can certainly see some advantages to this model, and I hope that at some point in the future, this will be an officially supported way to work with multiple databases. For now, the route we have to go, is via Proxy Items. They are not entirely bad either – that’s not it at all – but they seem (to me) a little less intuitive to use. Worst of all, however, they don’t hide from view the potentially thousands (see CEO presentation above) of content items being proxied in from the “products” database – I would personally prefer to be able to work like I just described here.


(In reality, there are lots of potential issues involved in this approach, and I can sort of see why Sitecore wouldn’t immediately support it)


But let’s proceed.


Configuring multiple databases using Sitecore Proxy Items

First thing I do is enable the RemoveUnknownChildren processor again. Now I’m back to a normal (and therefore supported) configuration.


First thing that needs to be done, is enabling proxies on the “master” database.  Find it in web.config, and toggle the setting.

<proxiesEnabled>true</proxiesEnabled>

Then, in the Content Editor (“master” database), navigate to /sitecore/system/proxies – and add a new Proxy.


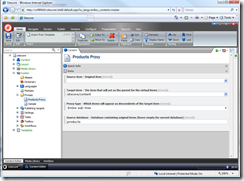
Most of the settings on the Proxy Item are fairly straight forward.


proxy


The “Source Item” field is a little bit tricky however. If you click, you get a navigation tree from your… “master” database. Not products, as one would hope. This is not news, I blogged about this in January 2006 – and the workaround is fortunately even simpler today than it was back then. I open up the View tab, switch on “Raw Values” and quickly paste my ID of the “Products Database” root folder into the field. After saving my Products Proxy, I can safely disable “Raw Values” again, and now I have:


proxy2


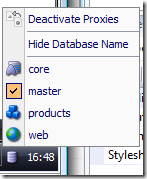
Because of what appears to be a slight quirk in the Sitecore Content Editor interface, I disable and then re-enable proxies using the new option that has now appeared in my database selector.


selector


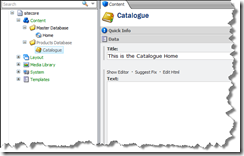
Once done, my content tree looks like I expect:


proxied


Notice how the items coming in from the “products” database are shown in grey. This is a visual cue to the editor, that these items are “different” – in effect in this case not coming from the same database at all.


Running a publish also yields the same results – we are now back to where we were using my first approach.


Setting up a shortcut to Products

One of the last things you would probably want to do, is set up an application shortcut to your “products” database.


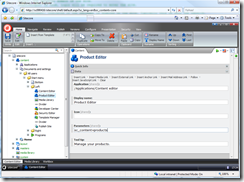
Fortunately, this is very easily achieved. Switch to the “core” database, and find /sitecore/content/documents and settings/all users/start menu/left/content editor – make a duplicate of it, and name your new item Product Editor.


Configure parameters like this:


producteditor


Especially make note of the “Parameters” field; where I am instructing the Content Editor application to use the “products” database instead of the default database.


Switch back to “master”, and you now have an extra option available on your Start Menu.


startmenu


And clicking the new “Product Editor” now take you directly to the “products” database, ready to edit.  Since this application shortcut can be configured with security just like you would expect, you can therefore configure users who can ONLY work with the “products” and not mess around with the rest of your site.


In summary

When I set out writing this article, I had a few ideas in mind. I thought I had a “new creative” approach to handling multiple databases in Sitecore – but it turned out to be perhaps a little TOO creative ;-)   The recommended approach is going via Proxy Items, and it seems like the safer way to go.


Regardless of method used, I still feel that Sitecore offers plenty of options of partitioning your data if the need arises. Performance-wise… well sure – I have no doubt you could produce a QUICKER (as in; performing faster) Product Catalogue working directly with SQL Server and Products/Categories and whatnot tables.


Just like you could absolutely create a QUICKER website, using only flat .html files ;-)


But there is a LOT to be gained by utilising the tools Sitecore makes available to us. Many of them were mentioned in the beginning of this article.


I, for one, do NOT relish the idea of having to create a full blown web based product administrative interface. Especially not late Friday afternoon. Anyone else? ;-)